Switching to solar energy is one of the smartest long-term investments you can make. But before installing solar panels, a solar feasibility study is essential. It ensures your system will be cost-effective, safe, and compliant with Indian regulations. It also prevents costly mistakes and helps you choose the right system size, components, and design.
This guide breaks the process into simple, actionable steps that anyone can follow — whether you are a homeowner, business owner, or industrial unit manager. All explanations are tailored to Indian conditions, policies, and market trends.
What is a Solar Feasibility Study?
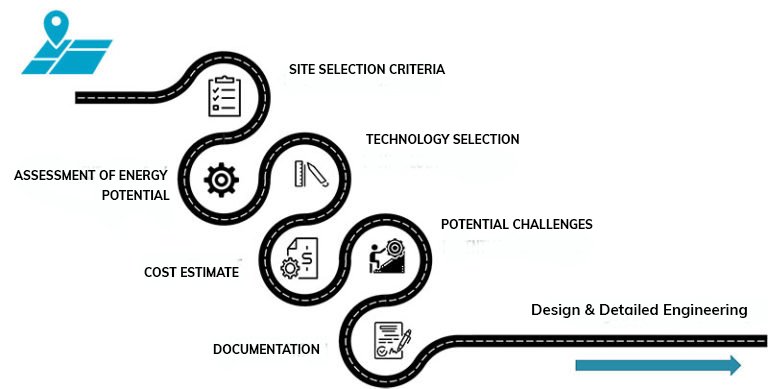
A solar feasibility study is a detailed assessment of whether a solar project will work for your location and needs. It covers:
- Roof or land suitability.
- Local solar resource data.
- Electrical system compatibility.
- Compliance with state and central policies.
- Accurate energy generation estimates.
- Cost, savings, and payback calculations.
- Risks and possible challenges.
For residential users, it can be done quickly but should still be thorough. For commercial and industrial (C&I) projects, the study is more detailed, including load profiles, policy models, and ROI analysis.
Why It’s Important in India
In India, solar economics depend heavily on state-specific net metering rules, tariff rates, and subsidies. Poor planning can lead to:
- Over-sizing the system, which wastes money.
- Under-sizing, leading to missed savings.
- Rejection of net metering applications due to policy mismatches.
- Structural safety issues on weak roofs.
A proper feasibility study ensures your solar project is technically sound, financially viable, and legally compliant.
Key Deliverables from a Feasibility Study
A good feasibility report should give you:
- Technical Fit – Can solar be installed safely at your site?
- Optimal System Size (kW) – Based on space, roof strength, and power needs.
- Expected Annual Energy Yield (kWh) – Using realistic climate and performance data.
- Policy and Metering Model – Net metering, net billing, or gross metering based on your state.
- Regulatory Compliance – CEA technical standards, BIS-certified modules, and inverter guidelines.
- Financial Analysis – Cost, savings, payback period, Internal Rate of Return (IRR), and Levelized Cost of Energy (LCOE).
- Subsidy Eligibility – For residential projects under central or state schemes.
- Risk Assessment – Technical, commercial, and regulatory risks.
- Implementation Plan – Step-by-step process and timeline.
- Decision Recommendation – Whether to proceed and under what configuration.
Step 1: Define Goals and Constraints
Start with a clear objective. Example:
“We want to cut our annual electricity bill by 40% using rooftop solar with a payback in under 5 years.”
Then list constraints:
- No structural modifications allowed.
- Budget limit (e.g., ₹12 lakh for a factory).
- Silent operation due to residential location.
For C&I users, set separate goals for each building or site, considering operational hours and power demand patterns.
Step 2: Collect Site and Power Data
A) Electricity Consumption
- Gather 12 months of electricity bills.
- Note contract demand, tariff category, and sanctioned load.
- Check demand charges, energy charges, and Time-of-Day (ToD) rates.
- Record diesel generator usage and fuel costs (if applicable).
B) Load Profile
- Create a 24-hour load profile for a typical day.
- For homes, log when ACs, water pumps, and appliances run.
- For factories, note process load timings, machinery, and shift patterns.
C) Physical Site Details
- Roof type: RCC slab, metal sheet, or ground-mounted.
- Available area (in m²) after removing shaded or obstructed sections.
- Parapet height, vents, antennas, or skylights.
- Structural load capacity — usually 12–20 kg/m² for RCC and lighter for metal roofs.
Step 3: Measure Solar Resource Availability
Use reliable Indian solar data sources like:
- NIWE (National Institute of Wind Energy) solar radiation data.
- Global Solar Atlas for location-specific PV potential.
Record:
- GHI (Global Horizontal Irradiance) – key for flat roofs.
- GTI (Global Tilted Irradiance) – for tilted panels.
Regions like Rajasthan, Gujarat, and Ladakh have the highest potential, while coastal and hilly areas may have slightly lower values.
Step 4: Check Policy and Metering Options
Your savings depend on how exported power is credited:
- Net Metering – Units exported offset units imported. Allowed for certain capacities (often up to 500 kW for most categories).
- Net Billing – Exported units credited at a fixed rate, imports billed at normal tariff.
- Gross Metering – All generation sold to DISCOM at a pre-decided tariff.
Check your state electricity regulatory commission (SERC) for specific limits and formats.
For residential projects, explore the PM Surya Ghar Muft Bijli Yojana subsidy, which can cover a large part of the installation cost.
Step 5: Ensure Technical Compliance
A feasibility study must verify compliance with:
- CEA Technical Standards for grid connectivity.
- BIS (Bureau of Indian Standards) certified solar panels.
- IS/IEC standards for inverters, mounting structures, and cables.
- Safety features like anti-islanding protection, proper earthing, and surge protection devices (SPDs).
Without compliance, your project may fail inspection or net metering approval.
Step 6: Plan Space and Structural Layout
- Calculate usable roof area after walkways and safety clearances.
- Decide panel tilt (10–30° for optimal output in India).
- Maintain row spacing to avoid shading between panels.
- Use east-west racking if height restrictions exist or you need higher density installation.
For metal sheet roofs, ensure mounting clamps are compatible and avoid drilling unless necessary.
Step 7: Choose Components and System Design
Modules
- Mono PERC, bifacial, or TOPCon for higher efficiency.
- 450–600W panels reduce BOS (Balance of System) costs.
- Verify BIS registration and warranty (25 years performance).
Inverters
- String inverters for simple layouts.
- Microinverters or optimizers for shaded or complex roofs.
- Must comply with Indian grid code and have service support.
Other Components
- DC and AC isolators, junction boxes, SPDs, and high-quality cables.
- Proper earthing for safety and lightning protection.
Step 8: Estimate Energy Generation
Two common methods:
- Performance Ratio (PR) method: Good plants achieve PR between 0.75 and 0.85.
- Capacity Utilization Factor (CUF) method: Indian rooftop solar CUF ranges from 15% to 20%.
Formula:
Annual Energy (kWh) = Installed Capacity (kWp) × 8760 × CUF
Or:
Annual Energy (kWh) = Installed Capacity (kWp) × PVOUT × PR
Adjust for:
- Temperature losses in hot climates.
- Dust and soiling losses.
- Partial shading.
- Annual degradation (~0.5% per year).
Step 9: Size the System for Best ROI
Match three limits:
- Space Limit – Based on available roof/land.
- Electrical Limit – Sanctioned load or transformer capacity.
- Policy Limit – State’s net metering capacity cap.
Run multiple scenarios (e.g., 5 kW vs. 8 kW for a home, 100 kW vs. 250 kW for a factory) and compare payback periods.
Step 10: Create the Financial Model
Include:
- CAPEX – Cost of modules, inverters, structure, BOS, installation.
- OPEX – Annual cleaning, insurance, inverter maintenance.
- Tariff Assumptions – Current and projected electricity tariff.
- Payback Period – Years to recover investment.
- IRR and NPV – For larger projects.
Residential paybacks in India are often 3–5 years with subsidies. C&I paybacks can be 2–4 years depending on tariffs and policy.
Step 11: Identify Risks and Solutions
- Technical Risks – Roof damage, component failure, shading.
- Commercial Risks – Tariff changes, policy shifts.
- Operational Risks – Poor maintenance, panel soiling.
Plan for regular cleaning, monitoring, and preventive maintenance.
Step 12: Implementation Plan
A typical timeline for rooftop solar in India:
- Site survey and feasibility – 1–2 weeks.
- Policy application and approvals – 2–6 weeks.
- Procurement and installation – 3–6 weeks.
- Net metering connection – 2–8 weeks depending on DISCOM.
Conclusion
A solar feasibility study is not just paperwork — it’s your roadmap to a profitable and trouble-free solar installation. By following these steps, you can design a system that gives maximum returns, complies with Indian regulations, and supports sustainability goals.
FAQs
1. How long does a solar feasibility study take?
Usually 1–3 weeks, depending on data availability and project size.
2. Can I skip the study for a small home system?
It’s not recommended. Even small systems benefit from proper sizing and compliance checks.
3. Does the study guarantee approval from the DISCOM?
No, but it ensures you meet all technical and policy requirements, which improves approval chances.
4. What is the cost of a feasibility study in India?
For small systems, ₹5,000–₹15,000. For large C&I projects, it can be ₹50,000 or more.
5. Can the same study be used for a bank loan application?
Yes, a detailed feasibility report helps in securing solar loans or subsidies.